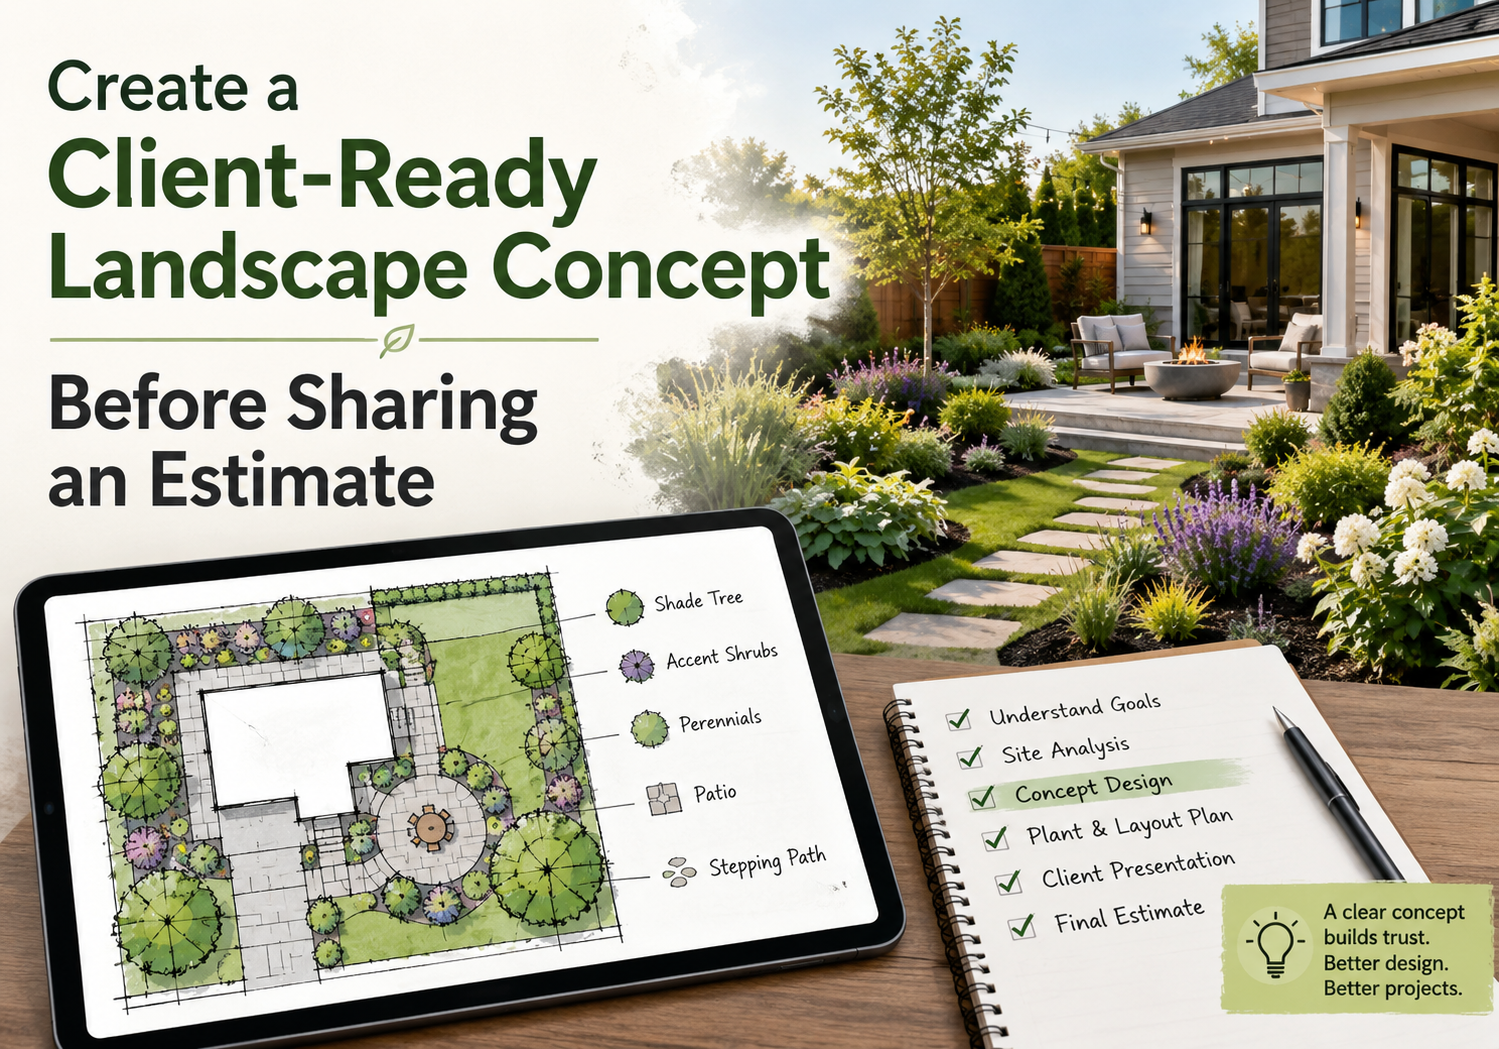
A landscape estimate should not be the first thing a client sees. Before you talk about cost, the client should understand the idea, the layout, the purpose of each design choice, and how the final outdoor space could look. That is where a client-ready landscape concept becomes important.
A landscape concept is not a full construction plan. It is a clear visual and written direction that shows the client what you are proposing before you prepare or present the estimate. It helps them see the value behind the work, not just the price. When done well, a client-ready concept can reduce confusion, avoid repeated revisions, improve trust, and make the estimate feel more justified.
What Is A Client-Ready Landscape Concept?
A client-ready landscape concept is a simple but polished design presentation that explains the overall direction of a landscaping project. It usually includes:
- The main design idea
- A rough or clear layout
- Key outdoor zones
- Suggested plants, hardscape, and features
- Visual references or 2D/3D previews
- Notes explaining why each element is included
- A clear connection between the client’s needs and the proposed solution
The goal is not to overwhelm the client with technical details. The goal is to help them understand the design before they review the cost.
Why You Should Create The Concept Before Sharing An Estimate
Many clients compare estimates only by price. If they receive a number without seeing the idea behind it, they may not understand why your pricing is higher, lower, or different from another contractor. A strong concept helps solve this problem. It gives context to the estimate. Instead of seeing “patio installation, planting, lighting, and cleanup,” the client sees a complete outdoor plan that fits their lifestyle, property, and goals. This also helps you avoid common problems such as:
- Clients asking for major changes after seeing the price
- Misunderstanding the scope of work
- Comparing your detailed proposal with a basic low-cost quote
- Approving an estimate without fully understanding the design
- Scope creep during the project
A concept makes the estimate feel more professional because the client can see what they are paying for.
Step 1: Start With A Clear Client Discovery
Before you create any concept, you need to understand what the client really wants. Many homeowners do not explain their needs clearly at first. They may say they want a “beautiful backyard,” but that could mean a space for kids, entertaining, privacy, gardening, or low-maintenance living. Ask simple but useful questions such as:
- How do you want to use this outdoor space?
- What problems are you trying to fix?
- Do you prefer low-maintenance landscaping?
- Do you need privacy, shade, seating, lighting, or better curb appeal?
- Are there pets, children, or elderly family members using the space?
- What parts of the current yard do you dislike?
- Do you have a preferred style, such as modern, natural, tropical, classic, or minimal?
- Is there a budget range you want us to keep in mind?
This step matters because the concept should not only look good. It should answer the client’s actual problem. For example, if the client wants a backyard for family gatherings, your concept should focus on seating flow, shade, lighting, and usable hardscape space. If the client wants curb appeal, the focus may be entryway planting, walkway improvement, symmetry, and front-yard balance.
Step 2: Visit Or Review The Site Carefully
A landscape concept should be based on the real conditions of the property. Even a simple concept can fail if it ignores site limitations. Review the space for:
- Sun and shade patterns
- Drainage issues
- Soil condition
- Existing trees and plants
- Slopes or uneven areas
- Access points
- Views from windows, patios, and the street
- Utility areas, meters, fences, and irrigation
- Existing hardscape that will stay or be removed
This helps you create a concept that feels practical, not just attractive. For example, a plant bed may look good in a drawing, but if that area receives harsh afternoon sun and poor drainage, the design may not survive long. A client-ready concept should show beauty, but it should also respect the site.
Step 3: Define The Main Design Goal
Before adding plants, pathways, lighting, or hardscape, decide the main goal of the concept. The design goal should be easy to explain in one or two lines. Examples:
- “Create a low-maintenance front yard with stronger curb appeal and better entryway focus.”
- “Turn the backyard into a family-friendly outdoor living space with seating, shade, and evening lighting.”
- “Improve privacy along the fence line while keeping the yard open and easy to maintain.”
- “Create a modern patio layout with clean planting beds and simple movement between indoor and outdoor spaces.”
This gives the concept direction. It also helps the client understand the thinking behind the design. Without a clear goal, the concept can look like a collection of random features. With a clear goal, every feature has a purpose.
Step 4: Break The Yard Into Functional Zones
A client-ready concept should show how the space will function. This is especially important for backyards, patios, side yards, pool areas, and larger residential properties. Common landscape zones include:
- Seating area
- Dining area
- Lawn or play space
- Garden beds
- Privacy planting
- Walkways
- Fire pit or gathering space
- Outdoor kitchen or grill area
- Poolside planting
- Entryway planting
- Utility or storage area
Zoning helps the client see how the space will be used, not just how it will look. For example, instead of simply placing a patio in the design, explain that the patio is positioned near the back door for easier indoor-outdoor movement. If you add privacy plants, explain which views they will screen. If you add a walkway, explain how it improves flow. Clients respond better when the design feels connected to daily use.
Step 5: Keep The Concept Simple And Easy To Understand
A concept does not need to include every small detail. In fact, too much detail can confuse the client before the estimate stage. Focus on the main items that affect the overall look, function, and cost. Your concept can include:
- Main layout
- Major planting areas
- Patio or hardscape location
- Lawn shape
- Feature areas
- Privacy zones
- Lighting direction
- Material mood or style
Avoid overloading the concept with technical construction notes unless the client needs them. A good concept should answer three questions quickly:
- What are you proposing?
- Why does it work for this property?
- How will it improve the outdoor space?
Step 6: Choose A Clear Design Style
A client-ready concept should have visual consistency. The plants, materials, shapes, and features should feel like they belong together. Some common residential landscape styles include:
Modern Landscape
Clean lines, simple plant choices, defined hardscape, neutral colors, and organized planting beds.
Natural Landscape
Soft edges, native plants, organic shapes, layered planting, and a more relaxed look.
Traditional Landscape
Balanced layouts, classic shrubs, defined borders, formal entryways, and timeless curb appeal.
Low-Maintenance Landscape
Durable plants, mulch or rock beds, efficient irrigation, simple lawn areas, and fewer high-care features.
Outdoor Living Landscape
Patios, seating areas, lighting, fire features, shade structures, and better movement from the home to the yard.
Choosing a style before estimating helps the client understand the design direction. It also helps you select materials and features that match the expected budget.
Step 7: Add Planting Ideas With Purpose
Plants should not be added only to fill empty space. In a client-ready concept, every major planting choice should have a reason.
Plants can be used to:
- Frame the entryway
- Add privacy
- Soften hardscape
- Create seasonal color
- Hide utility areas
- Reduce lawn maintenance
- Add shade
- Improve curb appeal
- Create structure around outdoor rooms
You do not always need to list every plant variety at the concept stage. But you should show the planting direction. For example:
- “Evergreen shrubs for year-round structure”
- “Flowering perennials near the walkway for seasonal color”
- “Tall screening plants along the fence for privacy”
- “Low-growing plants near the patio to keep sightlines open”
This helps the client understand the role of the planting plan before seeing the price.
Step 8: Include Hardscape And Materials Direction
Hardscape usually has a major impact on the estimate. That is why the concept should clearly show any proposed hardscape elements before pricing. Hardscape may include:
- Patios
- Walkways
- Retaining walls
- Garden edging
- Steps
- Driveway borders
- Fire pit areas
- Seating walls
- Paver spaces
- Gravel paths
At the concept stage, you can show the general material direction without finalizing every specification. For example:
- Concrete paver patio
- Natural stone pathway
- Gravel side yard
- Timber or stone edging
- Simple retaining wall
- Modern slab walkway
This gives the client a visual understanding of cost-driving elements. It also helps prevent surprises when the estimate includes hardscape pricing.
Step 9: Use Visuals To Make The Concept Easier To Approve
Most clients are not trained to read technical landscape drawings. A flat sketch or written description may not be enough for them to understand the design. Visuals make the concept easier to review. Useful visual formats include:
- 2D layout
- 3D design preview
- Before-and-after visual
- Plant mood board
- Material reference board
- Simple annotated yard image
- Concept notes placed directly on the design
Before-and-after visuals are especially helpful because they show the transformation clearly. Clients can compare the current yard with the proposed version and understand the value faster. This is where a landscape design app can make the process easier and more professional.
How iScape Helps Create A Client-Ready Landscape Concept
iScape can help homeowners, landscape designers, and contractors turn early ideas into clear visual concepts before presenting an estimate. Instead of explaining everything through words, you can use iScape to show how the yard could look with new plants, hardscape, lawn areas, lighting, and outdoor features. This helps clients understand the design direction before they commit to the next step. With iScape, you can:
- Create visual landscape concepts faster
- Show design ideas directly on property images
- Compare different layout options
- Present planting and hardscape ideas clearly
- Help clients visualize the final result
- Reduce confusion before sharing the estimate
- Make the proposal feel more polished and professional
For professionals, iScape is useful because it supports better client communication. A client may not understand a technical drawing, but they can understand a visual preview of their own outdoor space. For homeowners, it helps make design decisions with more confidence. They can see what works, what feels too crowded, and what needs to change before spending money on the project.
Step 10: Explain The “Why” Behind The Design
A client-ready concept should not only show what you are adding. It should explain why those choices make sense.
For example:
Instead of saying: “Add shrubs along the fence.”
Say: “Add evergreen shrubs along the fence to create year-round privacy and soften the view from the patio.”
Instead of saying: “Install a paver walkway.”
Say: “Install a paver walkway to create a cleaner path from the driveway to the front entry and improve curb appeal.”
These short explanations help the client connect design choices to real benefits. This also makes the estimate easier to accept because the client understands the purpose of each major item.
Step 11: Prepare A Simple Scope Summary
Before giving the full estimate, include a simple scope summary with the concept. This helps the client understand what is included in the proposed direction. A scope summary may include:
- Site preparation
- Removal of unwanted plants or materials
- New planting beds
- Lawn adjustment
- Patio or walkway installation
- Mulch or rock installation
- Lighting placement
- Irrigation adjustments
- Cleanup and finishing
Keep this section clear and simple. The goal is to connect the visual concept with the work required to build it. This also protects you from misunderstandings later. If something is not included, mention it before the estimate is approved.
Step 12: Identify Budget-Sensitive Items Early
Not every client understands which design elements increase the cost. A client-ready concept should help them see which parts are flexible and which parts are essential. Budget-sensitive items often include:
- Large patios
- Retaining walls
- Mature trees
- Extensive lighting
- Custom features
- Drainage work
- Irrigation upgrades
- Premium stone or pavers
- Major grading work
You can explain these items before sharing the estimate so the client is not surprised.
For example: “The patio size, paver choice, and lighting package will have the biggest effect on the final estimate. We can adjust these if you want to stay within a tighter budget.”
This makes the conversation more transparent and professional.
Step 13: Offer Concept Options When Needed
Sometimes one concept is enough. But for larger projects, it can help to show two options. You can present:
Option 1: Essential Concept
This version focuses on the client’s main needs, practical improvements, and a controlled budget.
Option 2: Enhanced Concept
This version includes upgraded features, better materials, more planting, lighting, or additional outdoor living elements. This approach works well because it gives the client a choice without forcing them to redesign everything. It also helps you avoid the common problem of sending one high estimate and losing the client because they assume there is no flexibility.
Step 14: Review The Concept Before Pricing
Before creating the final estimate, review the concept carefully. Ask yourself:
- Does the design answer the client’s main goal?
- Is the layout practical for the property?
- Are the major cost items clear?
- Is the design easy for the client to understand?
- Are there any missing details that could affect pricing?
- Are there features that may need permits, HOA approval, or special installation?
- Does the concept match the client’s budget expectations?
This review step helps you prepare a cleaner and more accurate estimate.
Step 15: Present The Concept And Estimate Together
Once the concept is ready, present it before or alongside the estimate. Do not simply send a price without context. A strong presentation flow can look like this:
- Start with the client’s goals.
- Explain the main design direction.
- Walk through the layout.
- Highlight key features.
- Explain why each major element is included.
- Mention flexible items.
- Share the estimate.
- Explain next steps.
This order matters. The client should understand the value before they focus on the number.
What To Include In A Client-Ready Landscape Concept
A strong concept should include the essentials without becoming too technical. Include:
- Project goal
- Existing yard problem
- Proposed design direction
- Main layout
- Outdoor zones
- Planting direction
- Hardscape direction
- Visual preview
- Key benefits
- Scope summary
- Budget-sensitive notes
- Next steps
This gives the client enough information to make a decision without feeling overwhelmed.
Common Mistakes To Avoid
- Sharing The Estimate Too Early:If the client sees the price before understanding the design, they may focus only on cost.
- Making The Concept Too Technical: A concept should be easy for the client to understand. Save detailed construction drawings for later stages.
- Ignoring The Client’s Real Use Of The Space: A beautiful design is not enough. The yard must support how the client lives.
- Not Showing Visuals: Many clients struggle to imagine the final result. Visuals help them approve faster and with more confidence.
- Leaving Out Cost-Driving Features: If patios, walls, lighting, or drainage work are part of the concept, make them clear before estimating.
- Using Generic Design Notes: Every concept should feel connected to the client’s property, not copied from another project.
Final Checklist Before Sharing The Estimate
Before sending the estimate, make sure your concept answers these questions:
- What problem does the design solve?
- What will the space look like?
- How will the client use the space?
- What are the main features?
- What materials or plant types are being considered?
- What parts affect the budget most?
- What is included in the scope?
- What can be adjusted if needed?
- What is the next step after approval?
If your concept answers these clearly, your estimate will feel more professional and easier to understand.
Conclusion
Creating a client-ready landscape concept before sharing an estimate helps turn a simple price conversation into a clear design conversation. It allows the client to see the value, understand the scope, and make decisions with more confidence.
A strong concept does not need to be complicated. It needs to be clear, visual, practical, and connected to the client’s goals. By reviewing the site, defining the design direction, showing visual ideas, explaining key choices, and using tools like iScape, landscape professionals can present estimates with better context and fewer misunderstandings.
For homeowners, this process also makes the project easier to understand before money is spent. Instead of guessing how the yard might look, they can review the concept, ask better questions, and feel more confident about moving forward. Download iScape on the App Store or Google Play Store today and start designing. Try a free trial today at iScape!
FAQs
1. What Is A Client-Ready Landscape Concept?
It is a clear design idea that shows the layout, key features, plants, hardscape, and purpose of the project before the estimate is shared.
2. Why Create A Concept Before Sharing An Estimate?
It helps clients understand the value of the design, not just the price. This can reduce confusion, revisions, and pricing objections.
3. What Should Be Included In A Landscape Concept?
It should include the project goal, layout, outdoor zones, planting direction, hardscape ideas, visuals, scope notes, and budget-sensitive items.
4. How Can Visuals Help In Landscape Proposals?
Visuals make it easier for clients to imagine the final result. They can see the design direction clearly before approving the estimate.
5. How Does iScape Help With Landscape Concepts?
iScape helps create visual landscape previews so clients can understand design ideas, compare options, and feel more confident before moving forward.